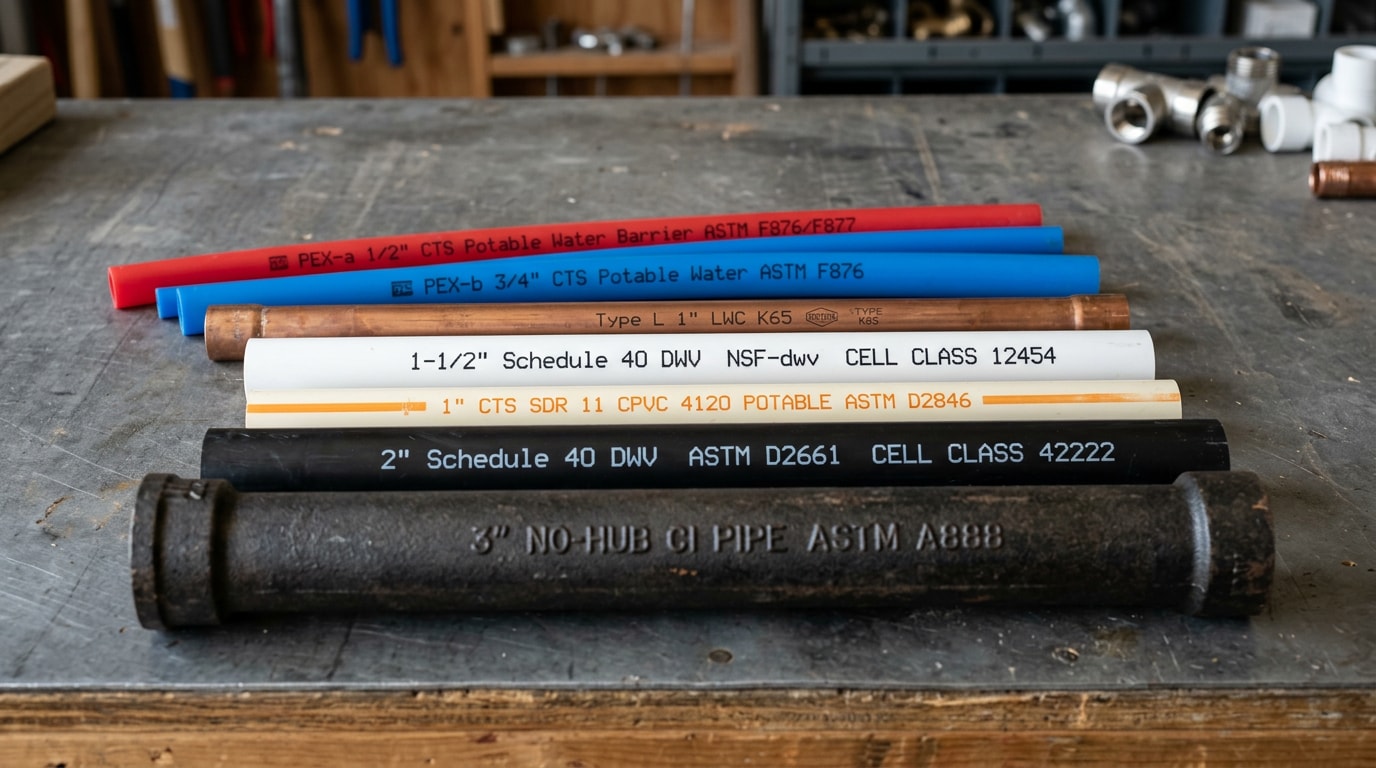
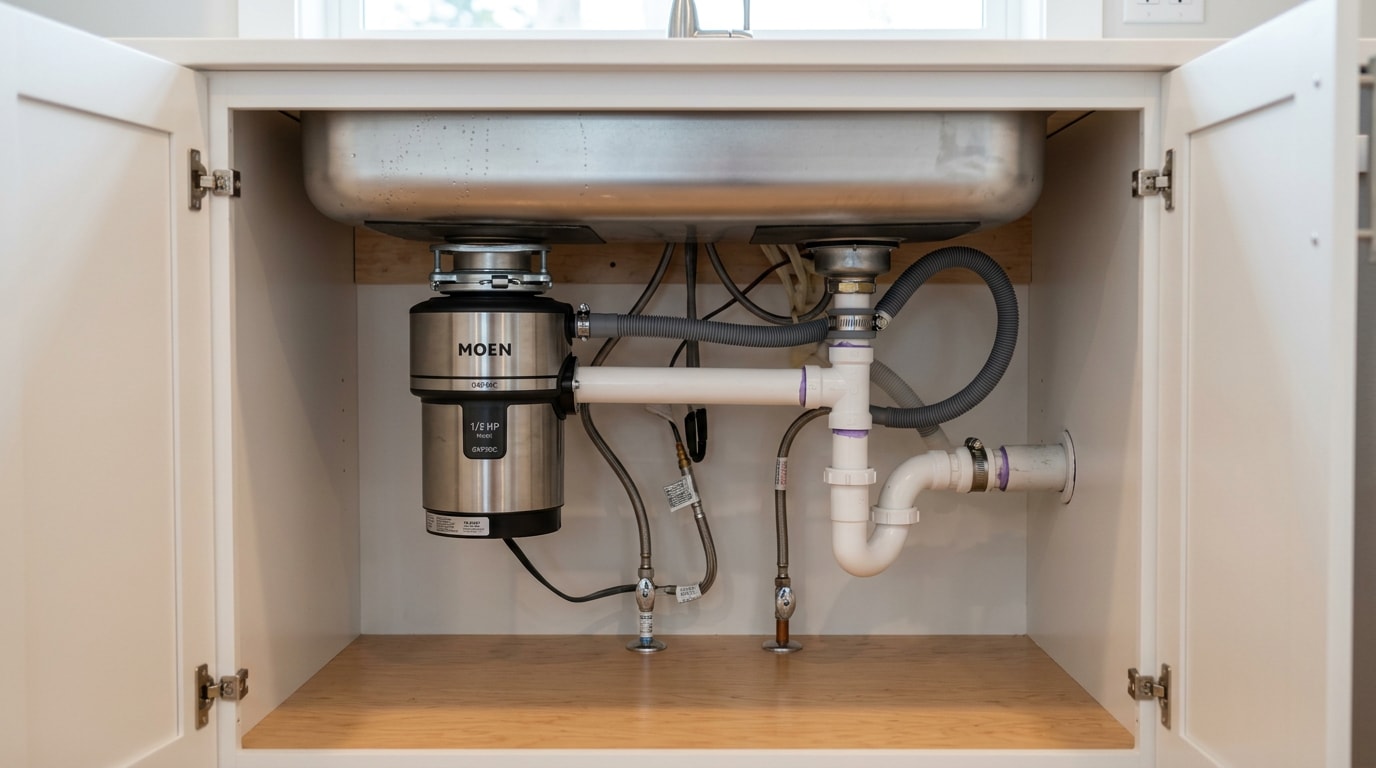
Garbage disposal plumbing is the short run of parts between your sink drain and the wall pipe: the flange, the unit, the discharge tube, the P-trap, and usually a dishwasher hose. Get one of those five wrong and you get a leak, a backup, or a failed inspection. Here is the whole path, part by part, with the code limits inspectors actually measure.
The Under-Sink Path, Start to Finish
Follow the water and the layout makes sense.
- Water and food waste enter at the sink flange.
- They pass through the disposal's grinding chamber.
- They exit sideways through the discharge tube.
- They drop into the P-trap.
- They run through the trap arm into the wall drain.
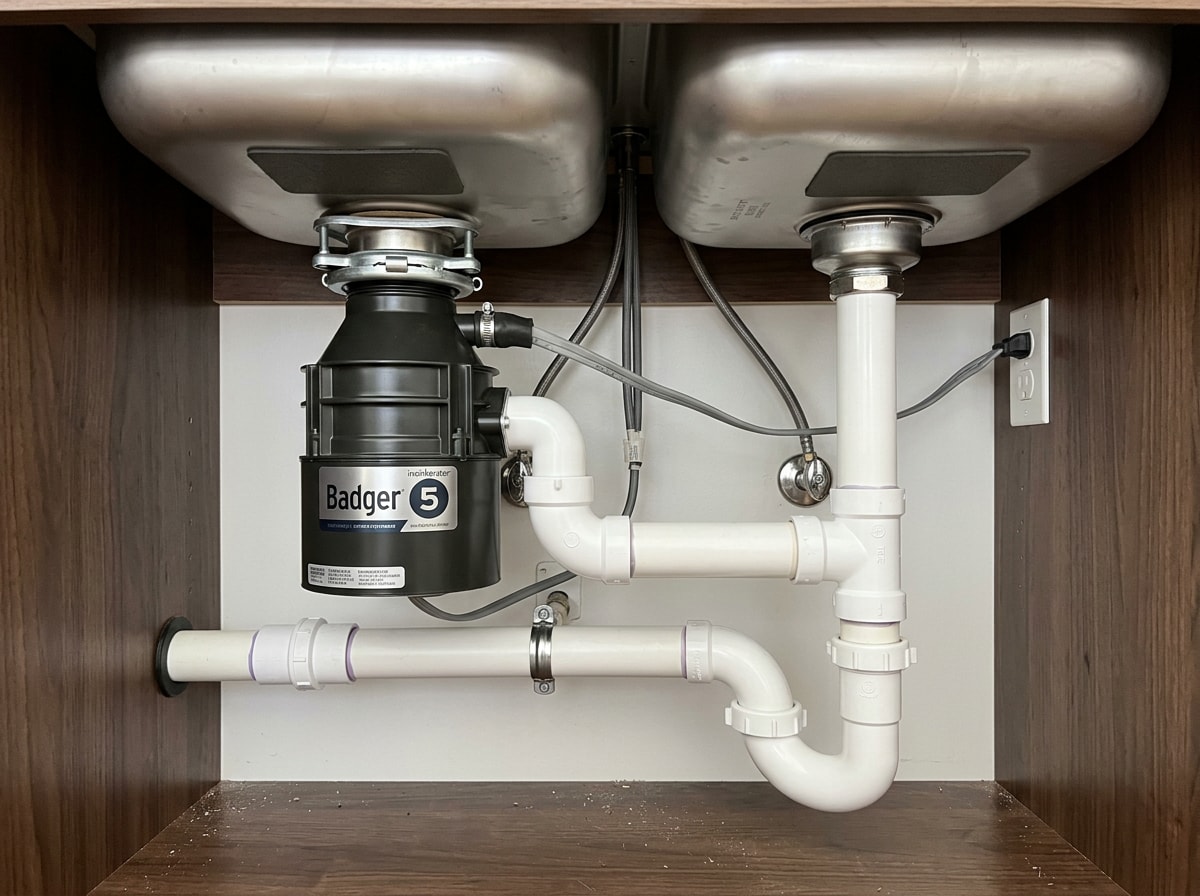
On a double bowl, the second basin ties into the discharge through a tee before the trap. The dishwasher hose feeds in near the top of the unit.
One detail most under-sink diagrams include but homeowners overlook: the vent pipe. It lets air into the drain line so the trap seal does not siphon dry. No vent, no reliable drainage, no matter how new the disposal is.
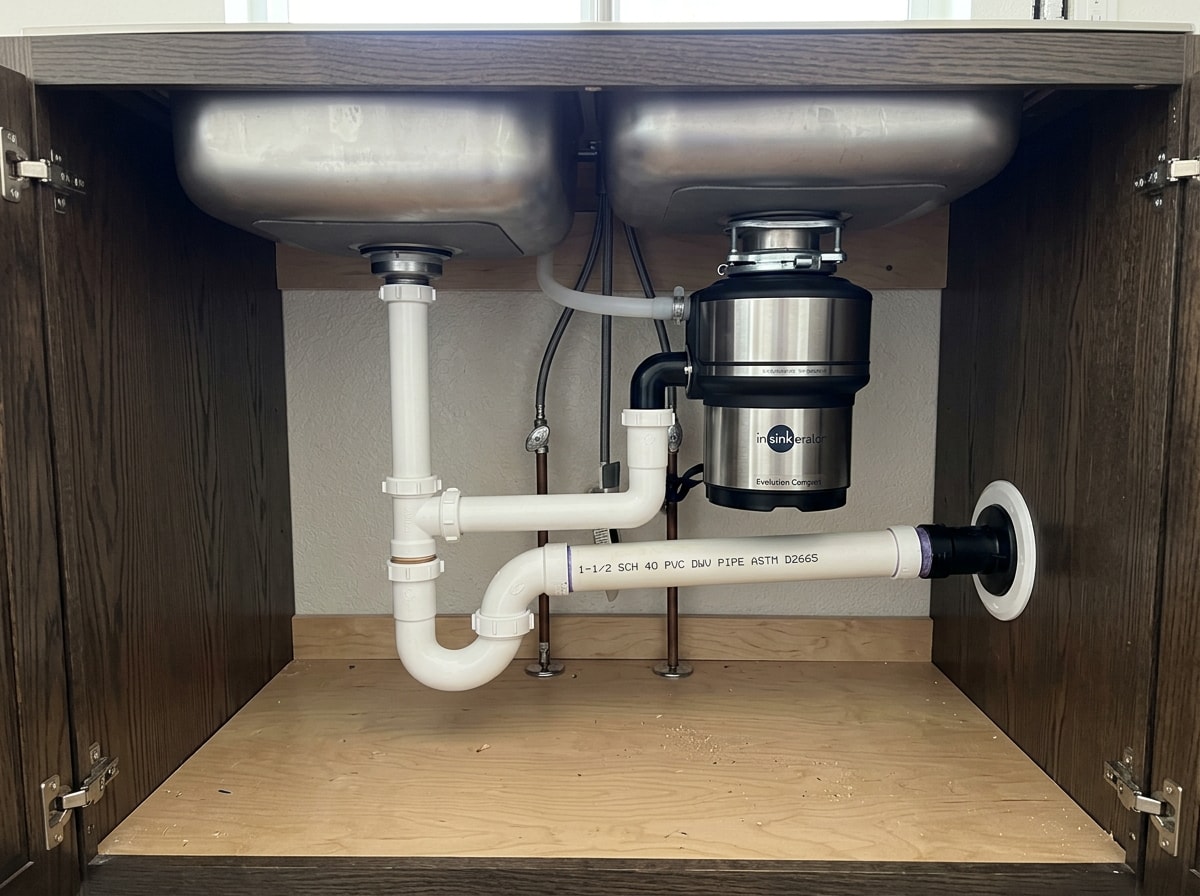
A disposal is not an appliance parked next to the drain. It replaces a section of the drain. That is why a bad unit so often shows up as a plumbing symptom first.
The P-Trap and the Code Limits Inspectors Measure
A P-trap is the U-bend that holds a small pool of standing water. That water seal blocks sewer gas from rising into the kitchen while waste still flows through to the wall.
This is where most DIY under-sink work fails inspection, because the rules are dimensional, not vague.
Under the model code, each plumbing fixture must be separately trapped by a liquid-seal trap, the vertical distance from the fixture outlet to the trap weir cannot exceed 24 inches, and the horizontal distance cannot exceed 30 inches measured centerline to centerline . Pull out a tape measure before you buy fittings. A disposal body eats several inches of that vertical budget on its own, which is exactly why a low-hung unit plus a deep trap can push a legal install over the line.
Double bowls get a specific allowance. A combination fixture may be installed on one trap provided one compartment is not more than 6 inches deeper than the other and the waste outlets are not more than 30 inches apart . Mismatched bowl depths beyond that, and you need separate traps.
Those numbers come from <a href="https://codes.iccsafe.org/content/IPC2012/chapter-10-traps-interceptors-and-separators">the published model code text on traps</a>, but adoption is local. Jurisdictions amend editions and add their own rules, so your building department has the final say at your address.
Other items that get flagged often:
- Double-trapping a single run. One trap per fixture, no more.
- S-traps on new work. Not permitted.
- Trap arm fall. Roughly 1/4 inch per foot toward the wall.
- Pipe size. Kitchen drains are typically 1 1/2 inch.
- Electrical. The unit needs a switched circuit, and GFCI protection is commonly required near a sink.
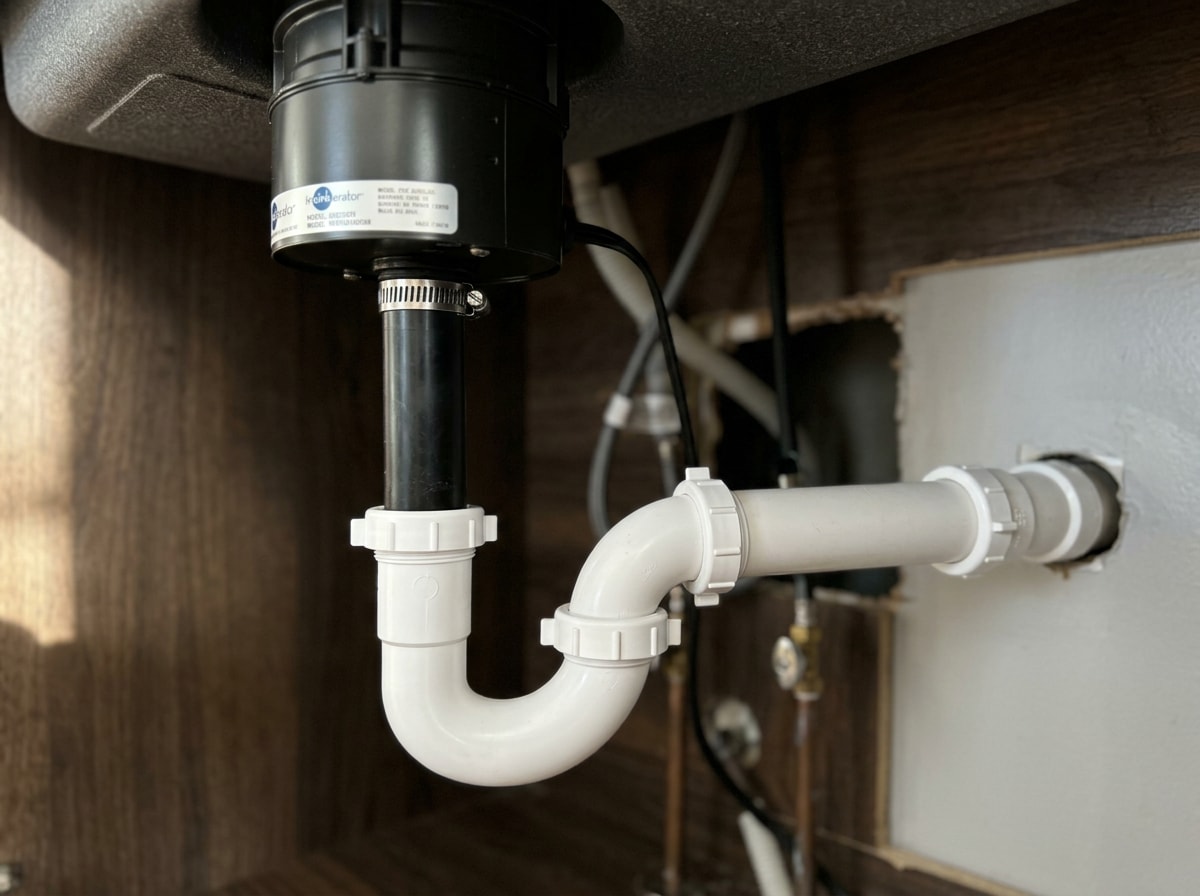
The slip joint mistake almost everyone makes
On a slip joint, the beveled rubber washer makes the seal, not the threads. Wrapping thread tape around those threads holds the washer off its seat and causes the exact leak you were trying to prevent.
The Sink Flange and Mount: Where Most Leaks Start
The stack assembles from the top down.
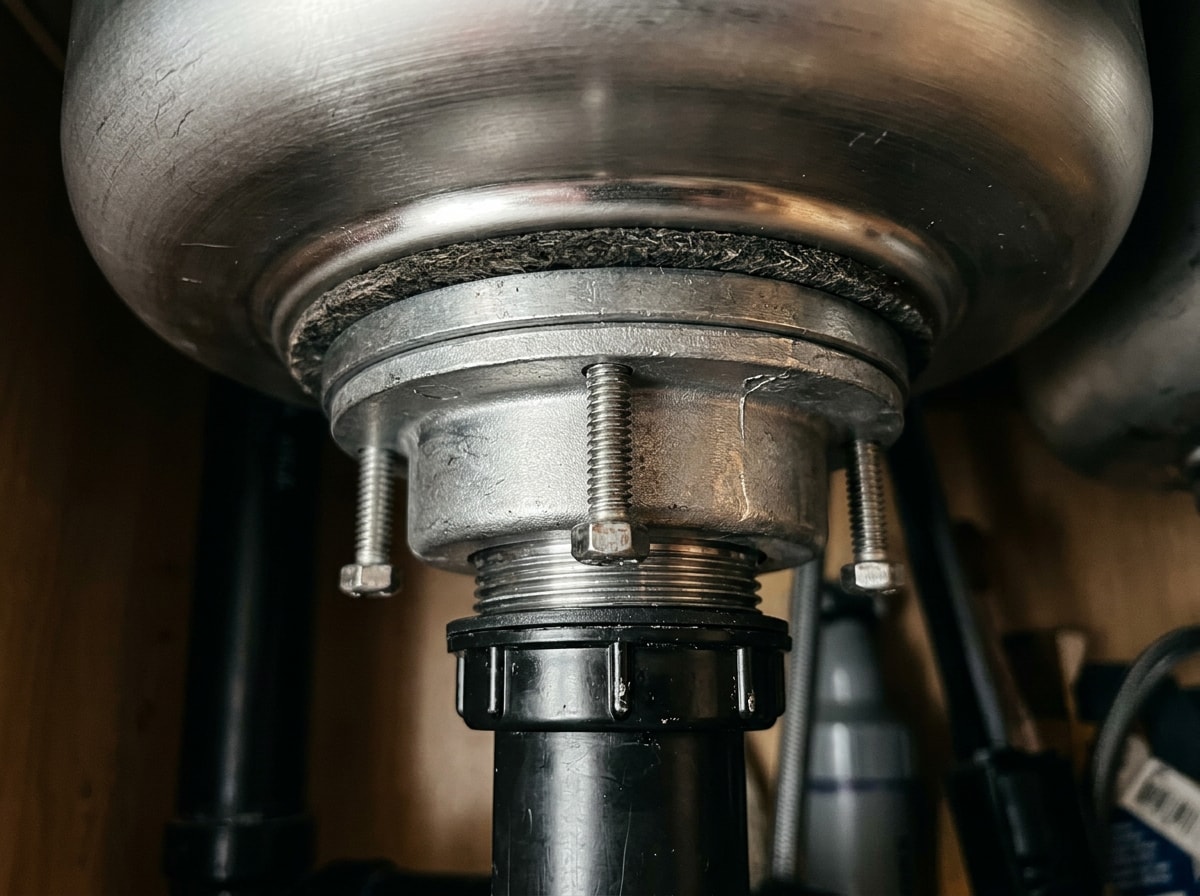
- The flange drops into the drain hole, bedded in plumber's putty or the supplied gasket.
- From below, a backup ring, fiber gasket and mounting ring slide up the flange sleeve.
- A snap ring clips into the groove to hold everything while you tighten the screws.
- The disposal twists onto the mount and locks.
In our own service work across San Jose kitchens, the majority of "my disposal is leaking" calls trace back to this joint, not to a failed unit. The putty dried and shrank, or the mounting screws backed off after years of vibration. Both are a 30 minute fix, not a replacement.
Mounting styles differ by brand. Twist-on collar systems and 3-bolt mounts are not interchangeable, so confirm which one you have before buying a replacement unit.
Not sure whether you are looking at a seal failure or a dying motor? Our plumbing repair team can diagnose it in one visit. Request a free estimate and skip the guesswork.
The Dishwasher Connection
The dishwasher drain hose leaves the pump, rises to a high loop fastened near the top of the cabinet, then drops onto the disposal inlet nipple and is secured with a hose clamp.
Here is the step that strands more DIY installs than any other. A new disposal ships with a knockout plug sealing that inlet from the inside. You have to tap it out with a screwdriver and hammer, then fish the loose plug out of the grinding chamber.
Leave the plug in the inlet and the dishwasher will not drain. Leave it loose in the chamber and it jams the turntable later.
High loop or air gap? Both stop dirty water siphoning back into the dishwasher. Some jurisdictions mandate a countertop air gap, others accept a properly secured high loop, so check locally before you drill a hole in the counter.
How the Grinding Actually Works
A disposal has no blades. Food waste disposers use no blades whatsoever, impellers mounted on a spinning plate use centrifugal force to drive the waste against a grind ring, and that ring breaks the waste into very fine particles , as the manufacturer explains in its <a href="https://support.insinkerator.com/app/answers/detail/a_id/833/~/food-waste-disposal-faqs">food waste disposer FAQ</a>.
That single fact kills two popular myths. There is nothing in there to sharpen, so grinding ice or eggshells does not "sharpen" anything. And because particles are flushed out through the ring, a weak water flow leaves solids sitting in your trap arm.
Septic vs. Sewer: Know Which One You Have
Everything you grind still travels to a treatment plant or a septic tank.
If you are on septic, the math changes. The EPA advises homeowners to limit garbage disposal use because food waste adds an unnecessary amount of solid material to the septic tank , and notes that if you must use one, the tank will need to be pumped more frequently . You can read the full guidance in the <a href="https://www.epa.gov/septic/how-care-your-septic-system">EPA's septic system care page</a>.
On municipal sewer, the concern shifts to grease. Grease never belongs in a disposal on any system. It cools in the trap arm, catches ground food, and narrows the pipe until the sink backs up.
Double-Bowl vs. Single-Bowl Layouts
On a single bowl, the disposal body replaces the basket strainer and tailpiece and feeds one trap directly.
On a double bowl, the second basin's tailpiece joins the disposal discharge through a tee ahead of a shared trap, or each bowl gets its own trap that meets further downstream.
Shared traps work well when both outlets sit at compatible heights. When one bowl has a disposal and the other does not, the height mismatch can push waste water up into the empty basin. Separate traps solve that.
| Layout | Parts needed | Clog risk at the tee | Cleanout access |
|---|---|---|---|
| Single bowl | Fewest: tube, trap, trap arm | None, no tee | Easiest |
| Double bowl, shared trap | Tee, extra tailpiece, longer tube | Moderate, grind debris meets the second drain | One trap to open |
| Double bowl, separate traps | Two traps, two arms, a joining fitting | Low | Two access points, more fittings |
Planning a layout change before you buy parts? See our plumbing installation options, or compare your setup against our kitchen sink plumbing diagram guide.
Installing a Disposal on a Single Sink
Treat this as a plumbing job with an electrical step attached.
Materials: disposal unit, 1 1/2 inch P-trap kit, dishwasher drain hose, hose clamp, plumber's putty, pipe thread sealant, bucket and towels.
Tools: adjustable wrench, hammer, Phillips and flathead screwdrivers, putty knife, safety glasses.
Before you start: shut off the circuit at the breaker and test it. Empty the cabinet. Dry the base so you can spot the first drip. Add a work light, because overhead kitchen lighting never reaches under there.
Connecting the drain pipes
- Fit the rubber gasket and metal flange to the disposal's side outlet, then bolt the discharge tube in place.
- Run the tube straight to the P-trap, or to a tee first if a dishwasher or second basin ties in.
- Dry-fit everything before cutting. Trim the tube so the trap sits square and lines up with the wall stub-out.
- Hand-tighten each slip nut, then add about a quarter turn with the wrench. Over-tightening cracks plastic nuts.
- Run water for a full minute, then run your fingers around every joint including the flange above. Dry hands mean you are done.
Forcing a misaligned trap puts constant stress on the joints. It will hold for a season and then weep.
Using the Diagram to Diagnose a Problem
The same map that explains the install also finds the fault. Match the symptom to the location.
| Symptom | Most likely source |
|---|---|
| Drip at the top of the unit | Flange seal or dried-out putty |
| Drip mid-body at a fitting | Discharge gasket or a loose slip joint |
| Standing water in both bowls | Clog in the trap or trap arm, downstream of the unit |
| Dishwasher backing up into the sink | Knockout plug still in place or a collapsed high loop |
| Hum with no grinding | Jammed turntable, not a plumbing fault |
| Leak from the body seam | Internal corrosion, replace the unit |
A pattern shows up on service calls: a disposal leak or a kitchen sink clog is frequently a drain line problem the disposal merely exposed. The unit pushes more solids into a pipe that was already narrowing with grease.
Know where to stop. Rewiring a circuit, re-piping the trap arm into the wall, or any leak from the seam of the unit's body is a job for a licensed pro. Our drain cleaning service clears the line itself, and if the sink is actively overflowing, emergency plumbing service is available. Check whether we cover your street in San Jose and surrounding areas.
FAQ
Do I need a separate P-trap for the disposal?
No. The disposal shares the trap the sink already uses. The discharge tube feeds that trap, which drains to the wall. The exception is a double bowl where the two outlets sit too far apart or at mismatched depths, in which case each basin gets its own trap.
Does a garbage disposal need its own drain line?
No. It ties into the existing kitchen drain line. What it does need is adequate pipe size, usually 1 1/2 inch, and a properly vented line so the trap seal holds.
Does a garbage disposal need a vent?
The drain it connects to does. Every fixture drain requires venting so air can enter behind the flow. Without it the trap siphons dry and sewer gas enters the room.
How do you unjam a stuck garbage disposal?
Cut the power at the breaker or wall switch first. Insert a 1/4 inch hex wrench into the center hole on the underside of the unit and rock it back and forth until the turntable spins freely. No wrench? Lever the impeller from above with a wooden spoon handle. Then press the reset button. Never put a hand inside the chamber.
Why does my sink back up when the disposal runs?
Because the clog is downstream of the unit, in the trap, the trap arm, or the branch line. Grinding more food just loads a pipe that is already restricted. Clear the line, do not keep running the disposal.
Can you put a garbage disposal in any sink?
Most sinks with a standard 3 1/2 to 4 inch drain opening will accept one. The real limits are cabinet depth below the bowl, the 24 inch vertical allowance to the trap weir, and whether there is a switched, grounded circuit available.
Do I need an air gap or is a high loop enough?
Both prevent backflow into the dishwasher. Which one is acceptable depends on your local amendments. Some jurisdictions require the countertop air gap, others accept a high loop secured near the top of the cabinet.
How long do garbage disposals typically last?
Most units run somewhere in the 8 to 15 year range. Horsepower, household size, what you grind and water hardness all shift that. Repair a jam, a bad switch or a leaking slip joint. Replace the unit if it leaks from the body seam or the motor has failed.
Do plumbers install garbage disposals?
Yes, it is routine work. You can supply your own unit or have the plumber bring one. It is a plumber's job rather than an appliance tech's because the disposal ties directly into the drain, the trap and often the dishwasher. See our full range of plumbing services for what is included.
Get It Done Right the First Time
Garbage disposal plumbing is simple until a measurement, a gasket or a code amendment says otherwise. If the trap will not line up, the dishwasher keeps backing up, or the cabinet floor is staying damp, bring in someone who installs these every week.
Gomez Sewer and Drain handles disposal installs, drain repairs and kitchen line clearing throughout Santa Clara County and the Peninsula. Request a free estimate and we will tell you whether it is a seal, a clog, or the unit.