A proper kitchen sink plumbing diagram maps four systems sharing one cramped cabinet: hot supply, cold supply, waste, and vent. This guide labels every part in the order water touches it, along with the dimensions and code limits an inspector actually measures. Open the cabinet door and read along with a flashlight.
How to Read a Proper Kitchen Sink Plumbing Diagram
A kitchen sink plumbing diagram is a scaled drawing of one fixture's supply and waste connections.
It shows the sink, drain assembly, P-trap, trap arm, branch drain, vent and shut-off valves, plus symbols for strainers, traps, disposals and dishwasher tie-ins, with rough-in height callouts, wall-to-trap-center distances and the required slope.
Read it in three passes, always in the same order.
- Supply side first. Follow the hot and cold lines from the wall valves up to the faucet shanks.
- Waste side second. Trace the strainer down through the tailpiece, into the trap, out the trap arm, and into the wall.
- Vent last. Find where the vent takes off from the drain line and where it rises.
That order matters because problems announce themselves in reverse. Supply faults drip. Waste faults leak or clog. Vent faults gurgle.
The Four Numbers Worth Measuring Yourself
Most diagram articles stop at naming parts. These are the four measurements that decide whether your setup passes or fails, and you can check all of them with a tape and a torpedo level.
| What to check | Target | How to verify it |
|---|---|---|
| Trap arm slope | 1/4 inch per foot falling toward the wall | Set a torpedo level on the arm; the bubble sits just off center |
| Fixture outlet to trap weir | 24 inches maximum | Tape from the bottom of the strainer to the top of the trap's outlet bend |
| Trap seal depth | 2 to 4 inches of standing water | Measure from the weir down to the top of the trap's inner dip |
| Kitchen drain and trap size | 1-1/2 inch nominal | Read the stamp on the slip nut or trap body |
Horizontal drain piping at this diameter pitches at 1/4 unit per 12 units, which is the slope spelled out in the model code sanitary drainage chapter. Flat pipe holds water. Steep pipe outruns solids.
The trap seal and the 24-inch drop both come from the residential code chapter on fixture traps. A seal shallower than 2 inches evaporates fast. A drop longer than 24 inches gives falling water enough speed to siphon the seal out behind it.
If two or more of those numbers are off, the fix is usually a rebuild, not a tighter nut. Schedule a free inspection and we will measure the cabinet before you buy parts. Background on the wider drain-waste-vent system lives on our plumbing services page.
Kitchen Sink Plumbing Parts, in Order From Faucet to Wall
These components appear in a fixed sequence, and swapping that sequence is exactly what turns a tidy install into a slow leak.
Water Supply Lines and Shut-Off Valves
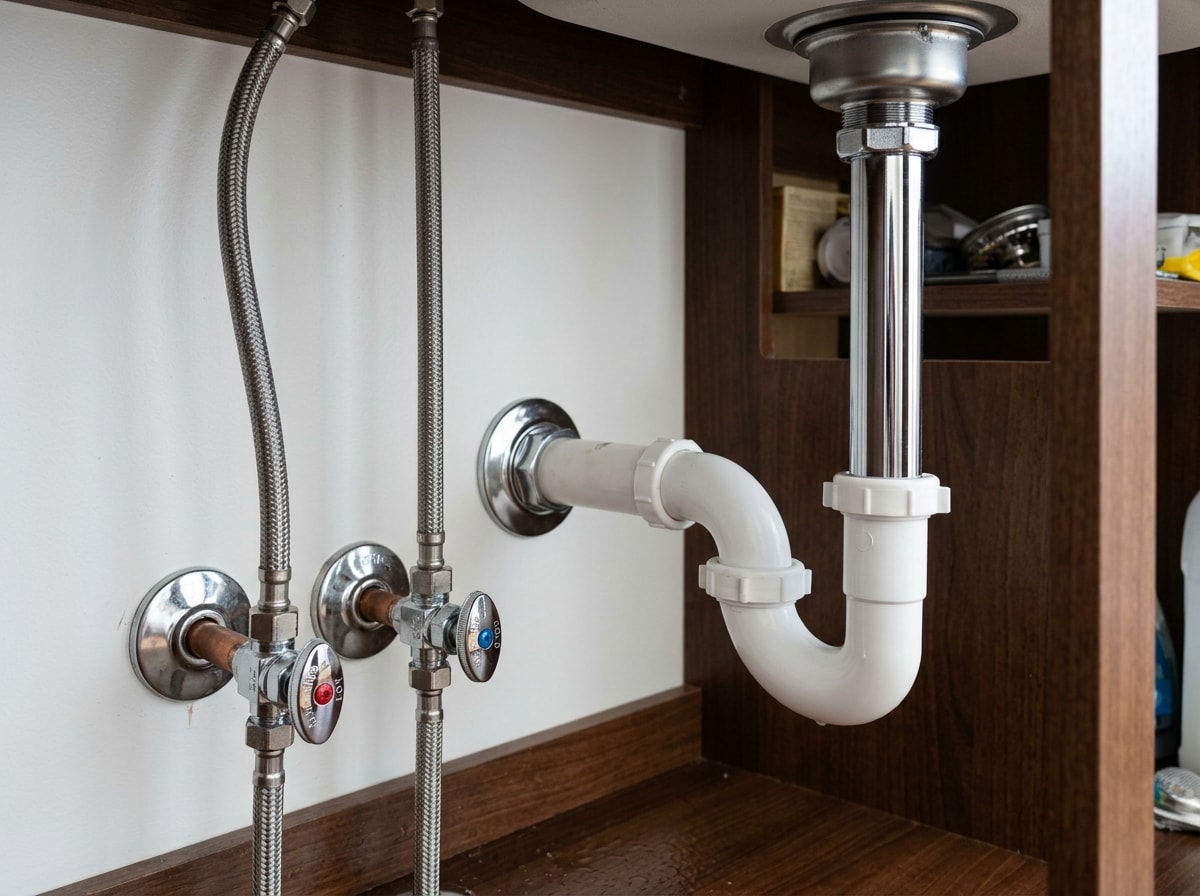
Two supply lines feed the sink, and both start at a stop valve on the wall or cabinet floor. One hot, one cold, never just one.
Those valves let you isolate the fixture for a faucet swap instead of killing water to the whole house.
At the faucet shanks, 3/8-inch compression connections are the standard. The flexible braided line between valve and faucet is the part most homeowners replace first, and a stainless-braided line outlasts plain vinyl every time.
Faucet, Spray Head, and Escutcheon
The faucet drops through one, two or three holes in the sink deck and clamps down from below with a mounting nut.
Pull-down and pull-out models add two more pieces to the diagram: a hose weight riding on the supply hose inside the cabinet, and a quick-connect at the spray head.
The escutcheon is the flat plate most people cannot name. It covers unused deck holes or the openings around wall-mounted pipes and keeps debris off the plumbing underneath.
Strainer, Flange, Gasket, Locknut, and Tailpiece
The basket strainer assembly stacks in a specific order.
- The strainer flange seats in the basin on a bead of plumber's putty.
- A rubber gasket underneath makes the watertight seal against the sink.
- A locknut pulls the whole assembly tight from below.
- The tailpiece runs straight down from the strainer body.
Dimensions worth knowing before you shop: kitchen sinks use a 3-1/2-inch drain opening, and the tailpiece is typically 1-1/2 inches in diameter and 6 to 12 inches long.
One substitution trips up nearly every first-timer. On a bowl with a garbage disposal, the disposal body replaces the basket strainer and tailpiece entirely. You get a mounting flange and a discharge tube instead.
P-Trap, Trap Arm, and Wall Stub-Out
The P-trap is the U-shaped fitting below the tailpiece. It holds a small pool of water that blocks sewer gas from rising into the room.
The trap arm carries waste horizontally from the trap to the wall stub-out, which ties into the branch drain and eventually the building drain.
Many traps include a cleanout plug at the bottom of the J-bend. Others have a separate cleanout fitting just before the wall. Either one gives you access to clear a minor clog without dismantling the assembly.
Sink Configurations and Appliance Connections
The shape of your diagram changes with bowl count and with whatever appliances tie in below the counter.
Single-Bowl Kitchen Sink Plumbing Diagram
The single bowl is the baseline every other layout modifies. One strainer, one tailpiece, one P-trap, one trap arm to the stub-out.
Because the drain assembly has no merge point, the whole run stays close to the wall and leaves real storage room in the cabinet.
It also gives you the most forgiving geometry. If the trap sits a little high or low, you can usually correct it by trimming the tailpiece rather than rebuilding the arm.
If you are mapping a new install, draw this version first and add complexity from there.
Double Kitchen Sink Plumbing Diagram
In a double bowl layout, each basin has its own drain opening, but both merge into a single P-trap and waste arm before reaching the wall.
The standard method gives each bowl its own basket and tailpiece, joined by a center tee set at the same height as both tailpieces. That assembly is called a continuous waste.
S-traps are out. They self-siphon and lose their water seal, so current practice pairs one P-trap with proper venting instead.
The two routings are not interchangeable.
| Center-tee (continuous waste) | End-outlet waste | |
|---|---|---|
| Clearance needed | More vertical room below the bowls | Less, since the trap sits at one end and higher up |
| Clog behavior | Debris settles at the tee center | Longer horizontal run collects more solids |
| Disposal compatibility | Good; disposal discharge feeds the tee | Best when the disposal is on the outlet-side bowl |
| Serviceability | Trap directly under the tee, easy to drop | Trap tucked to one side, more joints to break |
In a shallow cabinet, or any setup with a disposal eating vertical space, choose end-outlet. It moves the trap out from under the bowls and buys you height.
One field failure repeats constantly on our Santa Clara County service calls: the tee is set a half inch below one tailpiece, so that bowl drains into standing water. The homeowner reports that one side backs up when the other runs. Nothing is clogged. The tee is simply out of level.
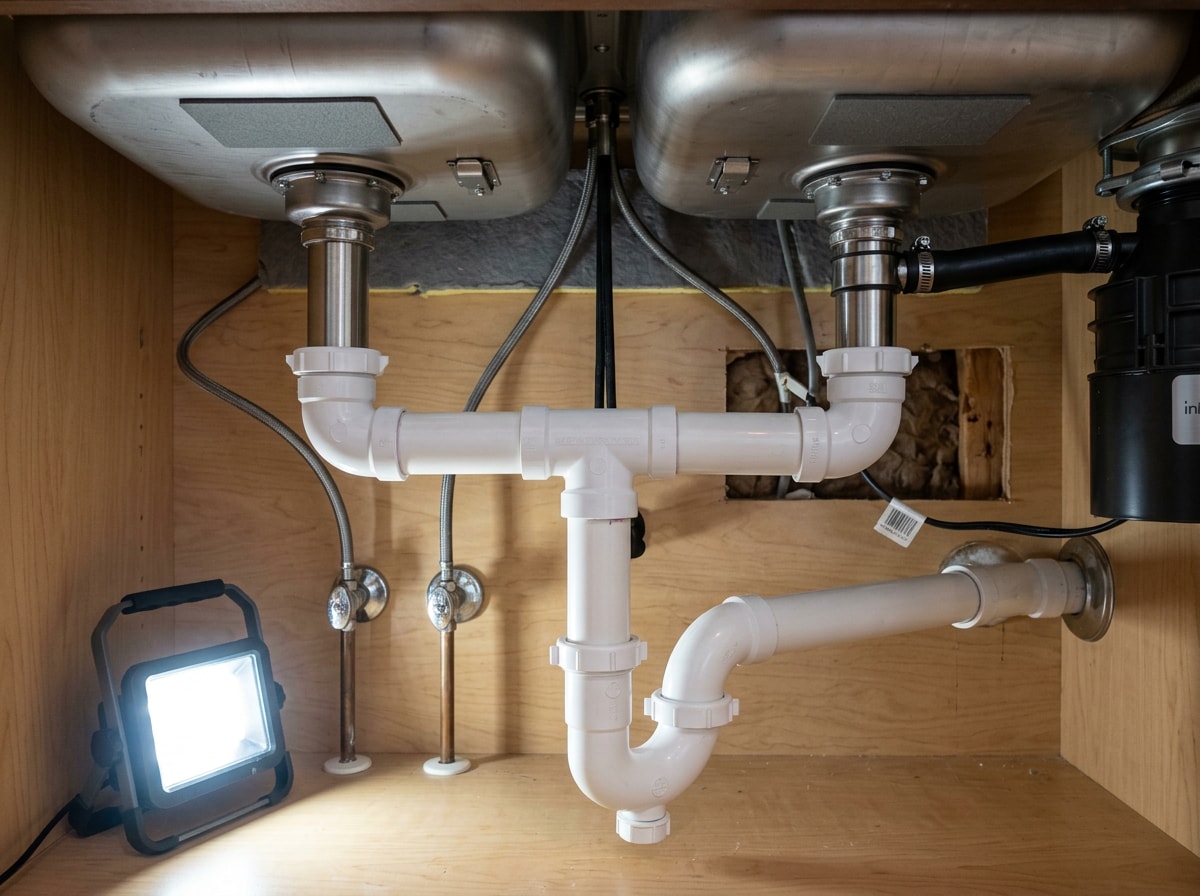
Garbage Disposal Connection
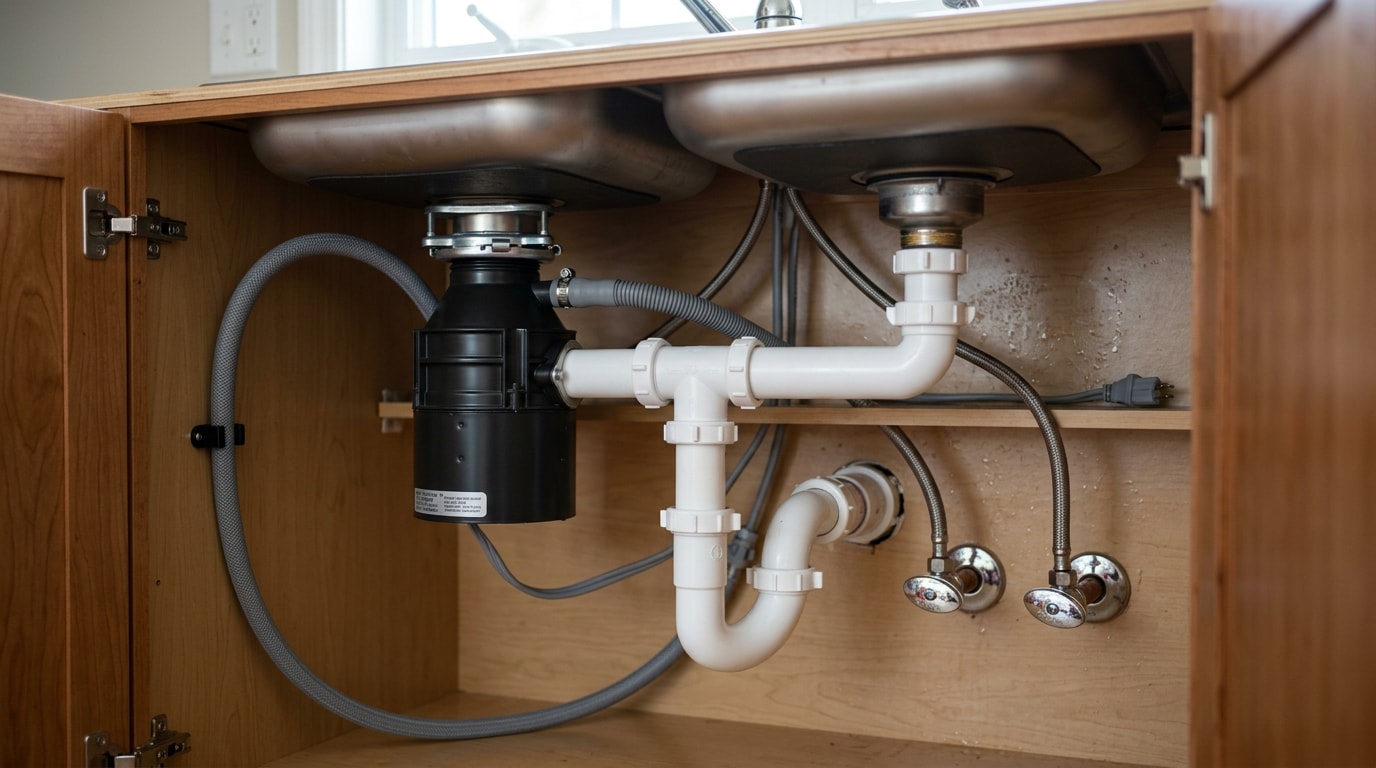
A garbage disposal replaces the basket strainer and tailpiece on its bowl. The unit mounts to the sink with its own flange and ring assembly, and waste exits through a horizontal discharge tube on the side of the housing.
That tube has to align with the trap inlet, at or slightly above it, never below. If the discharge sits low, you will fight the connection with extensions and end up with a flat run that holds debris.
On a double bowl, the discharge ties into the tee like any other branch.
Plan the power at the same time, since a disposal may be served by a dedicated circuit or a switched outlet depending on local rules. Manufacturer dimensions vary by model, so check the disposal installation instructions from InSinkErator before you cut the discharge tube. For a swap that also changes the drain layout, see our plumbing installation service.
Dishwasher Drain Hookup: High Loop or Air Gap
Two routings exist. A high loop secures the drain hose up under the countertop before it drops to the drain. An air gap mounts on the sink deck and breaks the line open to atmosphere. Both prevent drain water from backing into the dishwasher.
Either way, the hose ties into a knockout on the disposal or a T-fitting on the branch tailpiece. The unbreakable rule: connect upstream of the P-trap, never on the sewer side of it.
Here is where national guides get it wrong for California readers. Most articles say a high loop is fine. California is not a high-loop state.
The California Plumbing Code prohibits connecting a domestic dishwasher to the drainage system or a food waste disposer without an approved air gap fitting, installed with its flood-level marking at or above the flood level of the sink. If you are in San Jose, Palo Alto or anywhere else in the Bay Area, plan for the deck-mounted air gap and the extra sink hole it needs. Confirm the current edition on the California Building Standards Commission code page, since Title 24 is republished on a three-year cycle.
Venting: Why Your Sink Needs a Vent Pipe
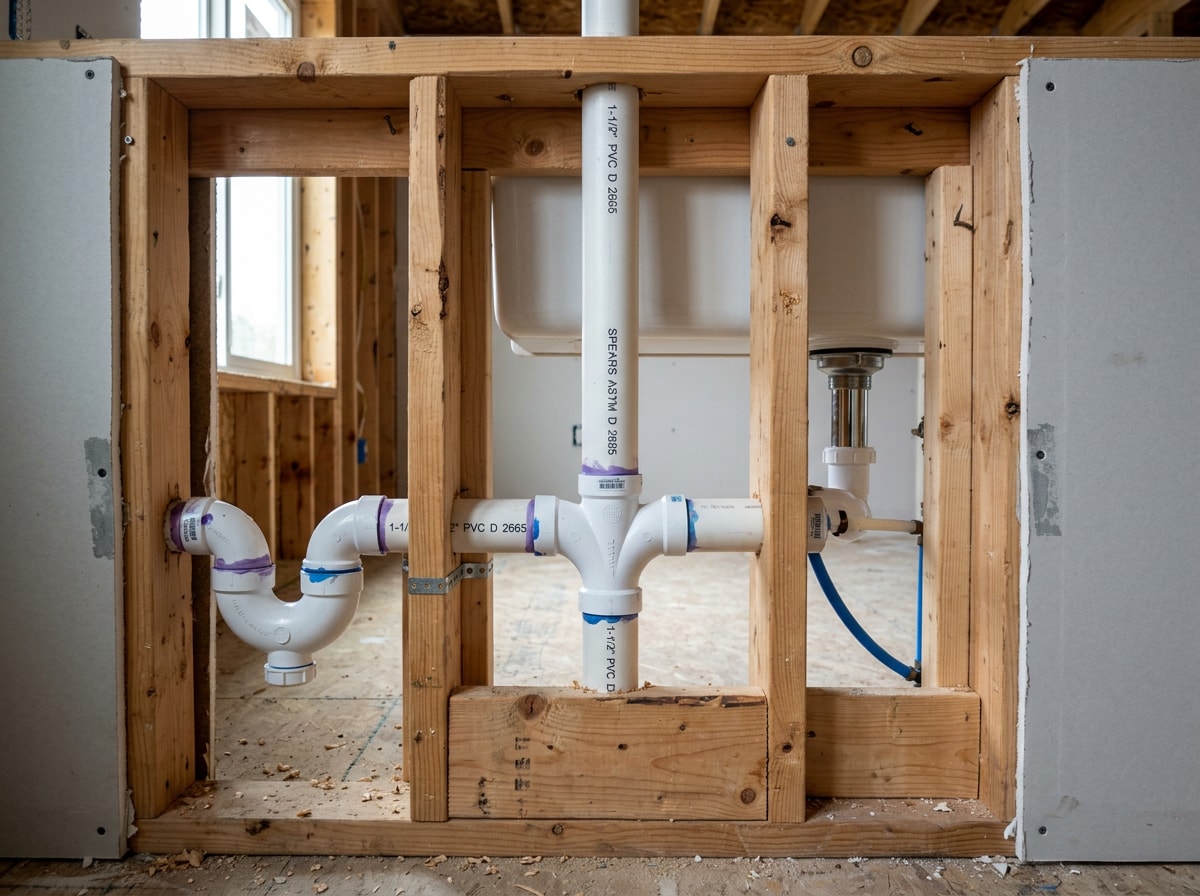
Once the waste arm enters the wall, the drain line connects to a vent that rises through the wall cavity and joins the vent stack.
When a slug of water heads down the drain, it drags air behind it. The vent feeds that air in from above. Without it, the only available air comes from the trap, and the seal gets siphoned dry.
Symptoms of a venting problem are distinctive:
- Slow drainage that no amount of plunging fixes
- Gurgling at the sink or at a nearby fixture when either one drains
- A trap that keeps going dry and letting odor through, even with daily use
The maximum distance between trap and vent is capped by trap arm size, commonly 42 inches for a 1-1/2-inch arm, but the figure varies with the code edition your jurisdiction adopted. Check with your local building department before you commit to a layout.
Islands and some basement sinks cannot reach a wall cavity for a conventional vent. An air admittance valve is one answer, but acceptance varies widely in California, and many local inspectors will only approve one under specific conditions. Ask before you buy.
Step-by-Step Kitchen Sink Drain Installation
Gather a bucket, channel-lock pliers, plumber's putty, a torpedo level and a hacksaw. Then work top-down.
- Set the flange. Roll a rope of plumber's putty under the strainer flange and press it into the drain opening until putty squeezes out evenly.
- Seal from below. Fit the rubber gasket and friction ring, run the locknut up by hand, then snug it with pliers. Wipe the excess putty off the basin.
- Hang the tailpiece. It must be vertical. Check it with the level, not by eye.
- Cut to fit. Dry-fit the trap and trap arm, mark, then cut with a hacksaw. Deburr the edges so washers seat flat.
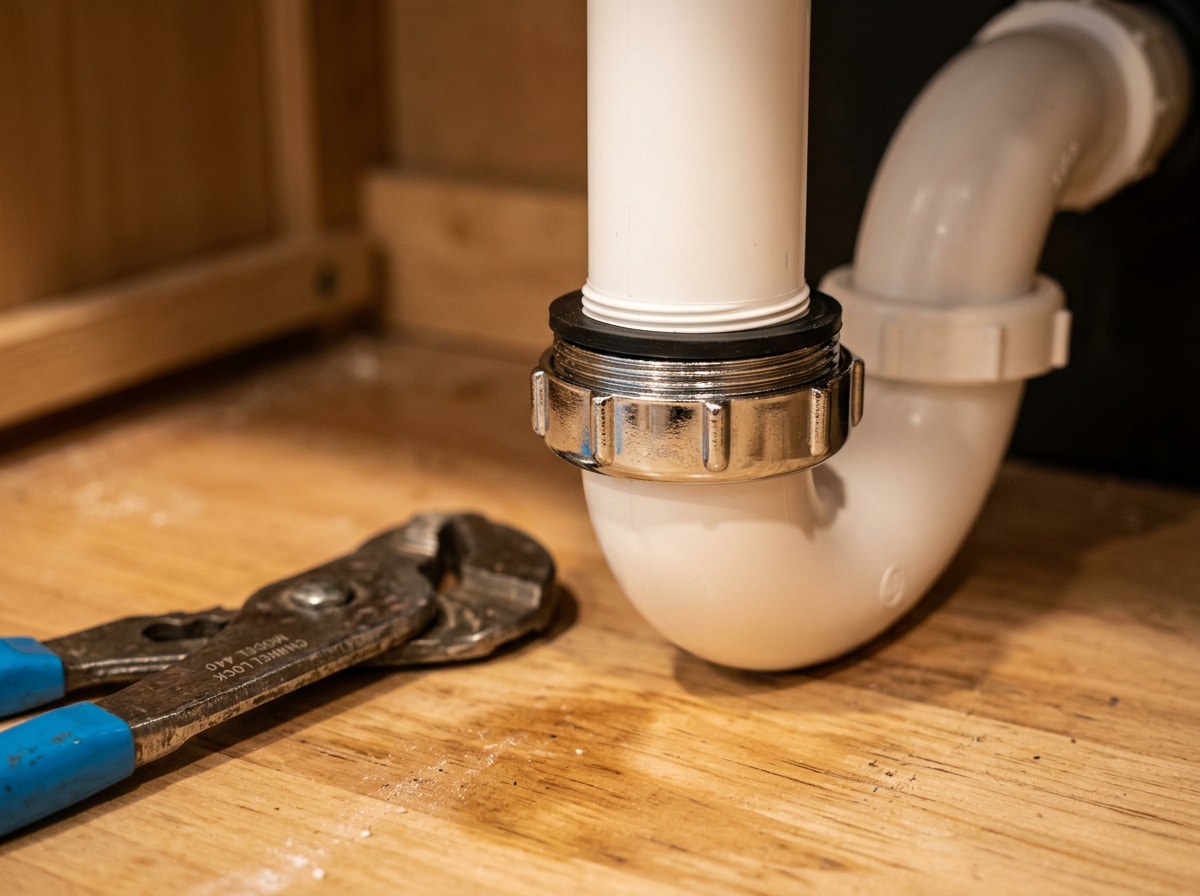
- Assemble the trap. Slide each slip nut and washer on in the right order, then connect the trap to the tailpiece and wall drain while holding 1/4 inch per foot of fall across the arm.
- Tighten smart. Hand-tighten plastic slip nuts, then a quarter turn with pliers at most. On metal threads, a little pipe thread compound adds leak protection.
For a joint that survives a decade, spend on the parts you never see: brass or stainless fittings, a quality strainer, braided supply lines, and removable slip joints rather than glued ones wherever access is tight.
Then test properly. Fill both bowls to the brim, pull the stoppers, and let the full volume dump at once while you watch every joint with a dry paper towel. A trickling faucet will not load the joints enough to reveal anything.
Common Problems and Quick Fixes
Water pooling around the drain opening. The seal between basket and bowl has failed: dried putty, a cracked gasket or a locknut that backed off. Remove the basket, scrape both surfaces clean, reseal with fresh putty and a new gasket, then retighten.
Drips at the trap. This is the most common leak location under a kitchen sink. Worn washers, a loose slip nut, or a hairline crack from over-tightening are the usual causes. Hand-tighten first. If it still weeps, replace the washer. If it weeps after that, replace the section, because a cracked nut will not seal at any torque.
Slow draining sink. Clogs start at the strainer, inside the trap, or in the trap arm where grease settles on the horizontal run. Clearing the trap by hand solves most of them. For anything past the stub-out, our drain cleaning service and drain snaking handle the branch line.
Know the limits of a cabinet-level fix. If the drain is slow and gurgling, or the trap keeps losing its seal on its own, the visible parts are not the problem. Look at venting, or at a partial blockage in the branch drain.
When to Hire a Licensed Plumber
The drain assembly itself is genuinely DIY-friendly. The scope boundary sits at the wall, and at the permit office.
Call a licensed plumber when:
- You are setting trap arm lengths or vent sizing from scratch, or the job needs a plumbing inspection
- A remodel moves the sink, adds fixtures, or changes drainage loads
- The work needs a permit under local rules
- You find unknown pipe materials, corroded fittings, or prior DIY work you cannot verify
Anything behind drywall, anything that ties into the stack, and anything an inspector signs off on is worth handing over. Our plumbing repair team can review a layout before you cut, and you can see finished work on our projects page.
This guide was written and field checked by the licensed plumbing crew at Gomez Sewer and Drain, who install and troubleshoot kitchen drain assemblies daily across San Jose and the surrounding area. Questions about your own cabinet? Contact us with a photo and the four measurements above.
Frequently Asked Questions
Does a kitchen sink drain need a vent?
Yes. Every trap must be vented under model plumbing code, and there is no practical exception for a kitchen sink. Without a vent, draining water siphons the trap seal dry and sewer gas enters the room.
How far below the sink drain should the P-trap be?
Model code limits the vertical distance from the fixture outlet to the trap weir to 24 inches. A longer tailpiece lets falling water gain enough speed to pull the seal out behind it, so extending a tailpiece to reach a low trap is the wrong fix.
What size drain pipe does a kitchen sink use?
Kitchen sinks use a 1-1/2 inch drain and trap, larger than the 1-1/4 inch pipe typical of a bathroom lavatory. Some older homes still have 1-1/4 inch kitchen drain lines. You will need an adapter, and the undersized pipe will clog more often.
What is the standard rough-in height for a kitchen sink drain?
Common practice puts the drain stub-out roughly 16 to 20 inches above the finished floor, with the supply stub-outs a few inches higher. Code does not fix a single number, so set it from your sink depth and cabinet, keeping the trap weir within 24 inches of the fixture outlet.
Can two sink bowls share one P-trap?
Yes. Two bowls sharing one trap through a continuous waste tee is standard practice. What is prohibited is double trapping, meaning a second trap in series on the same drain line, which traps air between the seals and kills flow.
Can a dishwasher and garbage disposal share the same drain?
Yes. The dishwasher hose connects to the knockout on the disposal body, and both discharge through the same trap. Two rules apply: the disposal knockout plug must be removed first, and the connection has to sit upstream of the P-trap.
Is a dishwasher air gap required, or is a high loop enough?
It depends on your adopted code. California requires an approved air gap fitting on the discharge side of a domestic dishwasher, so a high loop alone will not pass here. Other states accept the high loop. Either way, connect upstream of the trap.
Why does my sink gurgle even though it is not clogged?
Gurgling is air being pulled through the trap seal because the vent is blocked, undersized, or too far from the trap. Clearing the drain will not stop it. The fix is at the vent, which usually means a camera look at the branch line and vent takeoff.